Learn how to view and navigate in the trips list, manage and modify your trips, learn more about your per trip driving behaviour and add any undetected trips
Use the below links to navigate through the sections relevant to you:
- Viewing and Navigating the Trips List View
- Understanding the Trip Card in the Trips list View
- Detail on Individual Trips
- Adding a Trip Manually
- Saving favourite locations
You can navigate to your trips by tapping on this icon ![]() in the bottom navigation of the Brightmile Driver App.
in the bottom navigation of the Brightmile Driver App.
By default, the trips list will be showing the trips done today.
Viewing and Navigating the Trips List View
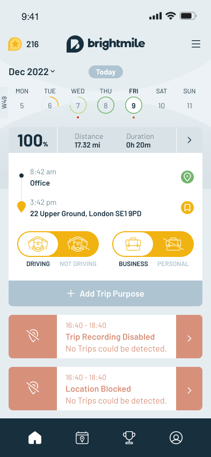
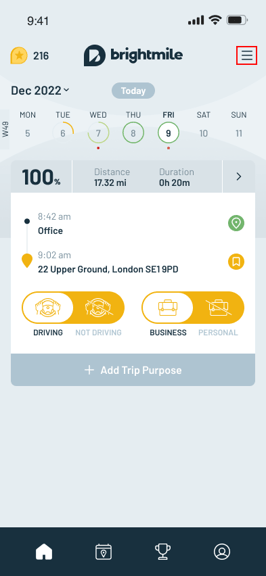
This is how the trips list view should look once you start to record some trips during the week
-png.png?width=187&height=405&name=Trip%20Calendar%20(2)-png.png)

Coloured circle - A day with Business trips, indicating the percentage of safe driving for that day.
- Red = less than 25% safe
- Pink = 25% - 50% safe
- Light Green = 50% - 75% safe
- Dark Green = more than 75% safe
 Dashed grey circle - A day with only personal trips
 No circle - A day with no trips
Trip Detection & Blocked Permissions
This feature makes it easier to understand when historically the Brightmile App has been blocked from detecting trips during working hours.
The timeline at the top of your Trip View will show information to clearly identify:
- Periods where Geolocation and Trip Recording was disabled
- Periods where permissions/access to device location were blocked
The timeline will only show for periods where detection was blocked during working hours.
As a reminder Brightmile requires certain permissions to function properly, such as access to your device's location. If these permissions are blocked or disabled, trip detection will be disabled.
To view the timeline navigate to the Trip page and look for any dates on the calendar that have a red dot below them. This signifies that there was blocked detection during all or part of the working hours on that day.

If you click on the day you will then be able to see details of when trip detection was disabled.
Understanding the Trip Card and the Trips list View
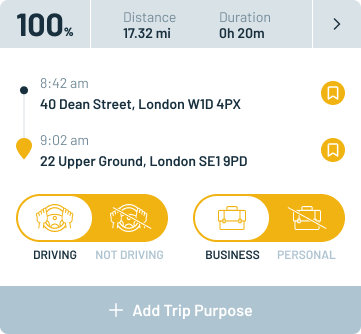
Details of the Trip Summary Card
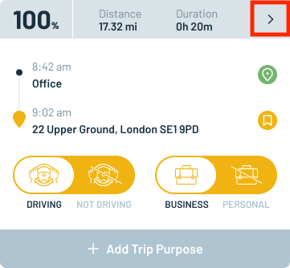
The starting point and start time of your Trip

The end point and end time of your Trip 
Whether you were the Driving or not for the relevant Trip

Whether the relevant Trip was a Business or Personal Trip

Trips should be classified as ‘Business’ where you made such a Trip for business purposes.
Any Trip not conducted for business purposes should be classified as ‘Personal’. You can however re-classify any Trip as ‘Business’ or ‘Personal’ at any time by pressing on ‘Business’ or ‘Personal’ for such Trip.
Only ‘Business’ Trips will be included in the Driver Score and Five Pillar scores that you see on the ‘Home’ page, and that are reported to your employer.
Note that it may take up to 30 mins for your overall driver scores and trip scores to update after you re-classify a trip. Mileage reports will however reflect all recently re-classified trips.
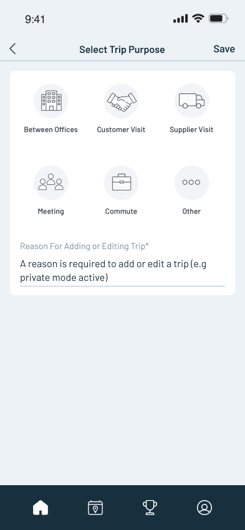
Detail on Individual Trips
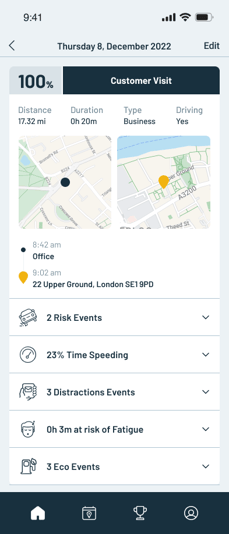
Note that we do not tell you where individual incidents occur (e.g. exactly where you were Speeding or where a particular Distraction Event occurred). This is because at Brightmile we do not dwell on individual incidents, nor are individual incidents reported to your employer.
Rather we focus and report on trends which we observe over time to identify patterns (e.g. whether you are a habitual speeder or user of your smartphone whilst driving) and are not susceptible to individual incidents.
Adding a Trip Manually
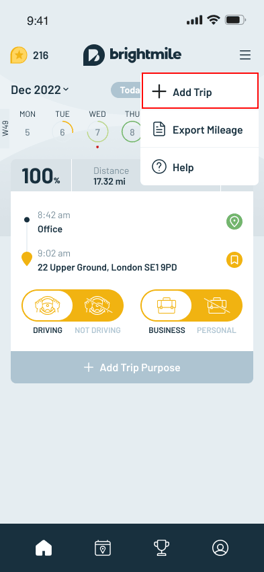
Why do my trips sometimes split?
Brightmile automatically stops trips based on triggers such as leaving the vehicle and walking or to account for drivers taking a rest in the car but not leaving it, when there is no movement for 5 mins.
In heavy traffic it is not possible for us to identify the difference between being sat in the vehicle stopped or being stuck in traffic for 5 minutes.
Split trips will not affect your overall driver behaviour scoring.
Saving favourite locations
An additional feature to help you keep track of your trips is Saving Locations, this feature allows you to use friendly names to replace the address for regularly visited locations, making it easier to recognise your trips.
You can add, edit and delete your saved locations through the settings page in your app - or directly in the trip view.
To access via the settings page, click on Saved Locations towards the bottom of the page.

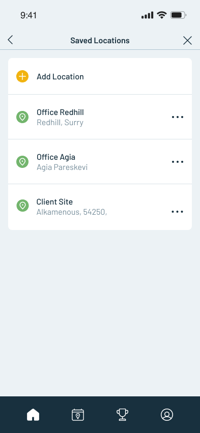
To add a new location, click ‘Add location’ at the top of the screen. From here you can add a name for your location and the address. Start typing the location you would like to save in the search bar and once the map shows the correct location click confirm.
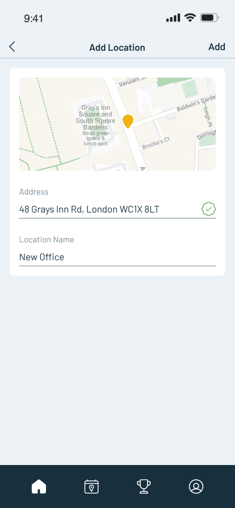
You can also see any previously saved locations. If you need to edit or delete a location, click the three dots on the right side of the address.
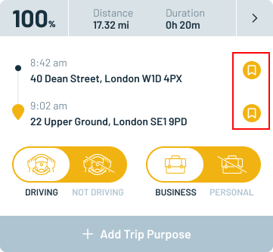
You can also add or edit a location directly from the trip page, either by clicking the icon next to the start/stop location in the list view or by clicking the address field on the trip details page.
